
Start a video post
Choose your project, then use either path:- Content Hub: Click Add your own idea, open Attach context, and choose Upload video.
- Library: Open Videos, select a video, and click Create post. Or choose From library inside the video composer.
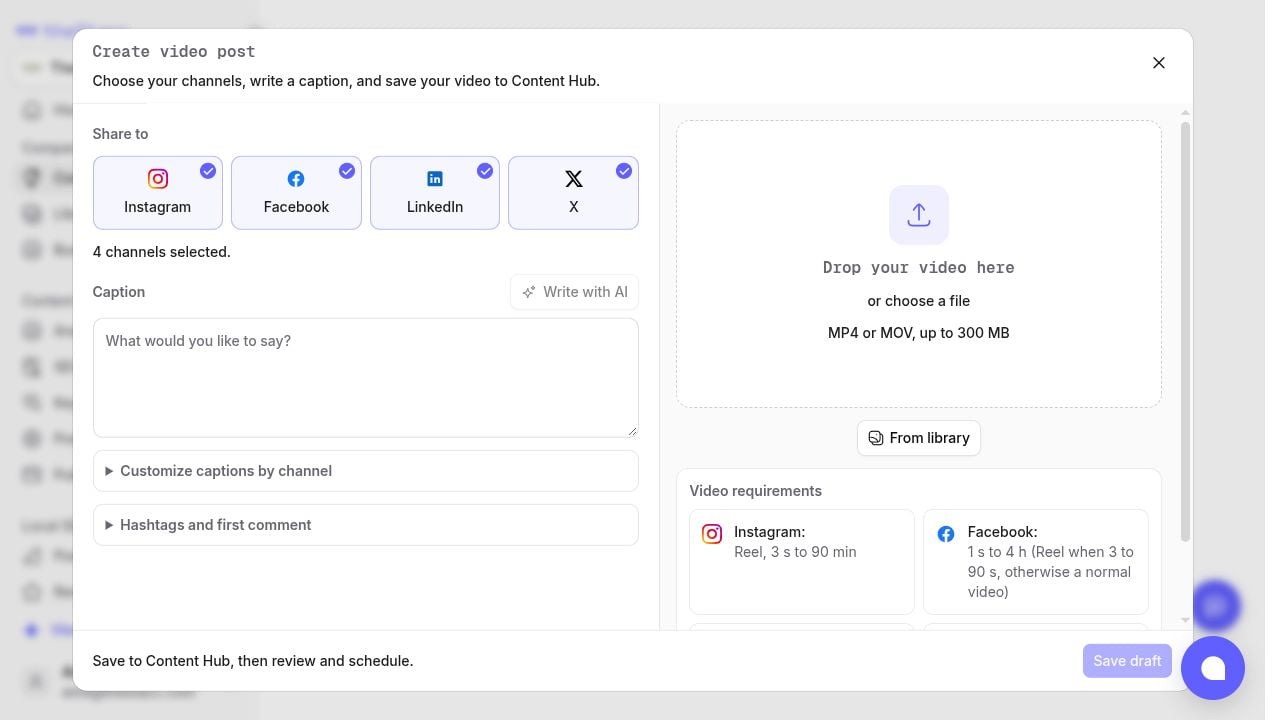
Choose a file or reuse a Library video. The composer shows the channel requirements.
New video uploads and AI caption assistance require an active Social plan. Publishing also requires an active Social plan and a connected account for each channel you select. Connect your accounts.
Add the post’s details
- Under Share to, select the channels you want to use.
- Write your Caption. Write with AI can draft or improve it; review the suggested wording before saving.
- Open Customize captions by channel for different wording on each channel. A blank channel caption uses your main caption.
- Open Hashtags and first comment to add tags and an optional first comment.
- Switch between the channel previews to check your text and video. The final layout can vary by platform.
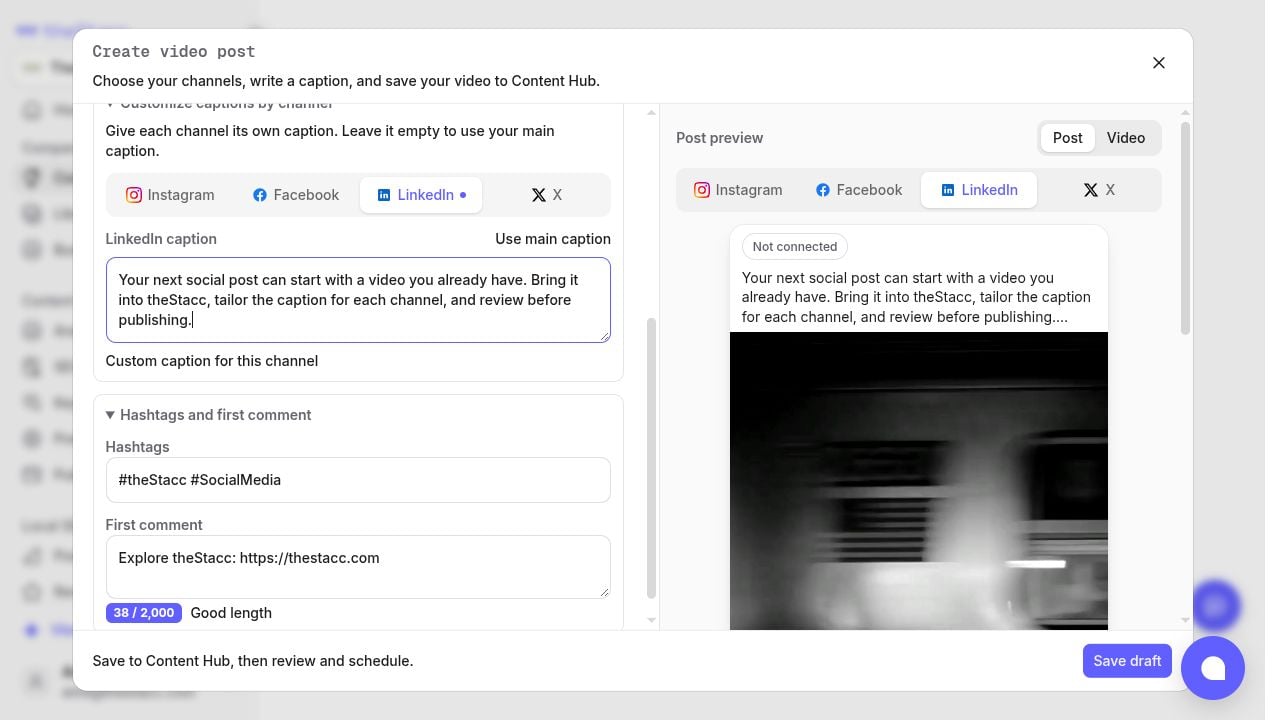
Tailor the caption for a channel without changing the main caption.
Choose a cover for a new upload
In the video preview panel, scroll to Cover image, move Choose a frame, and click Use this frame. This selects the cover; it does not trim or change the video. A video selected from Library keeps its saved cover.Save and review
Click Save draft and wait for it to finish. New uploads show their upload progress. The saved post appears in Content Hub for review; saving a draft does not publish it. Open the post’s Review view. Play the video and check each channel tab. Use Edit post to change the selected channel’s caption and first comment, or the post’s shared hashtags. See Edit Social Posts for the drawer controls.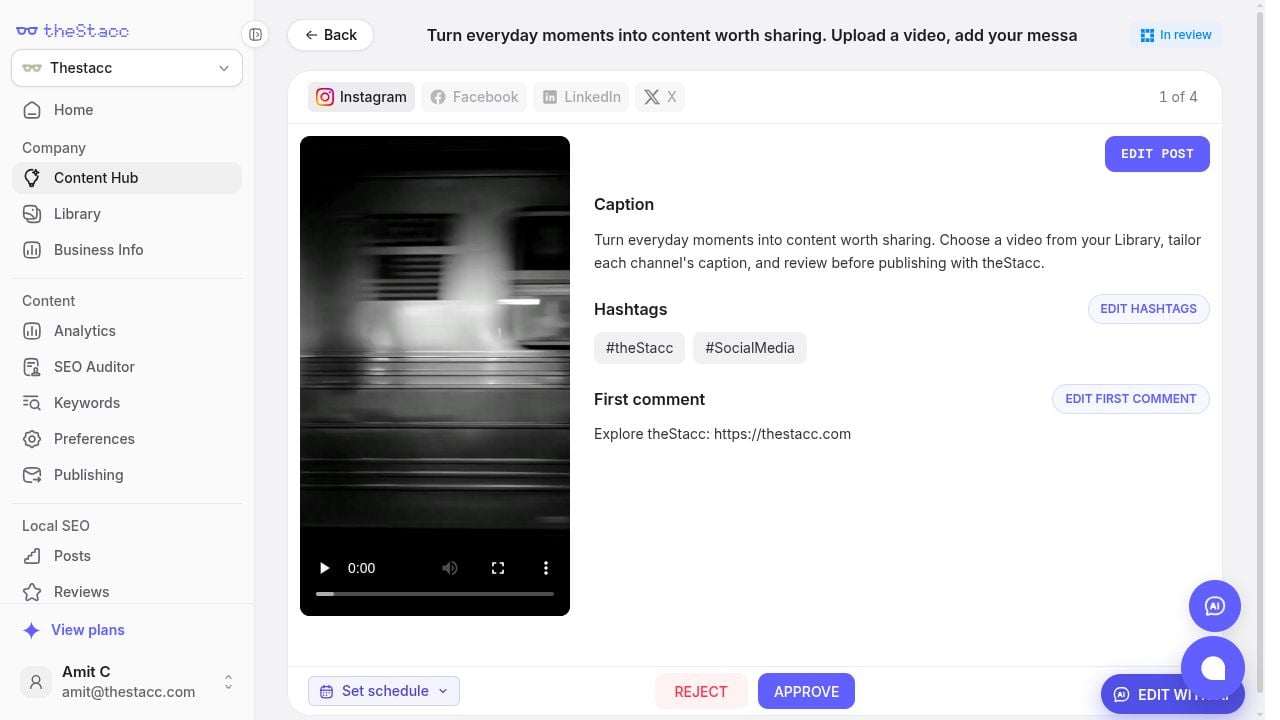
A saved video draft stays In review until you decide what to do next.
Schedule and publish
Open Set schedule, choose a date and time, check the timezone shown in the popover, and click Update Schedule. Saving a date is separate from approving or publishing the post.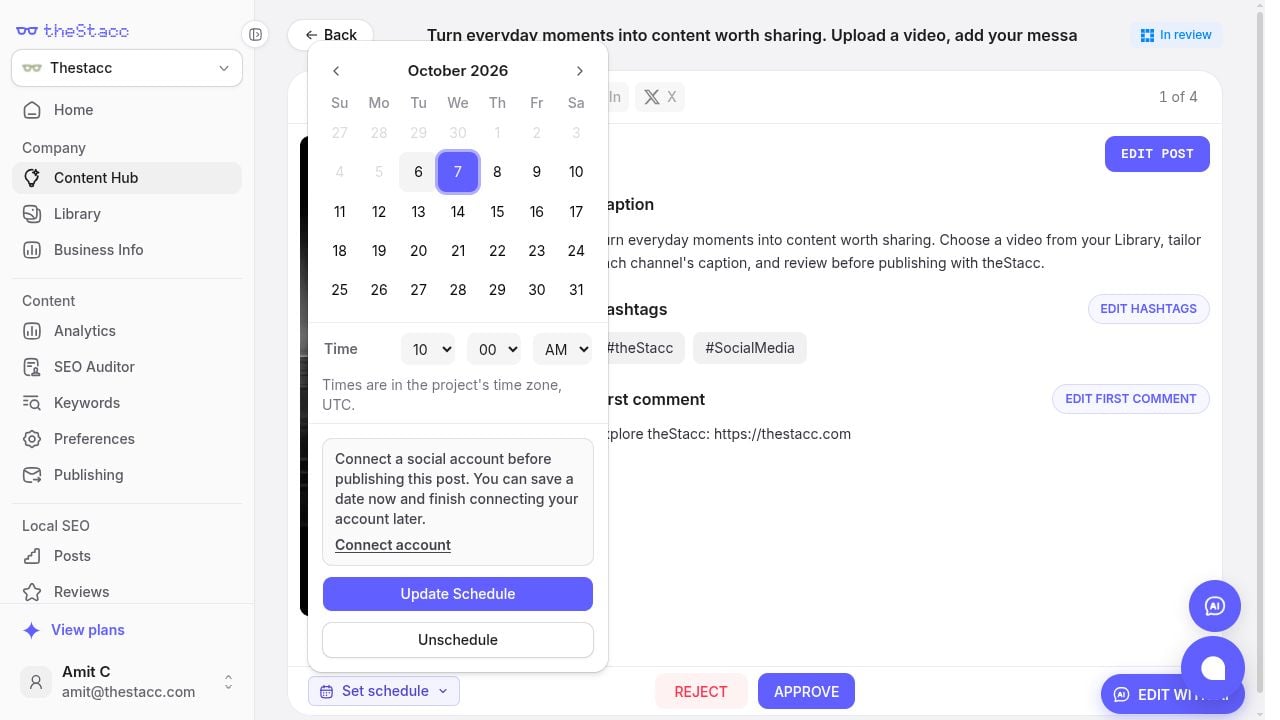
Check the displayed timezone and resolve connection warnings before publishing.
If something needs attention
- The file is rejected: Use MP4 or MOV within 300 MB, and check the duration requirements for the selected channels. Export a compatible clip before trying again.
- The upload fails: Read the error, then use the retry control. Check your connection and active Social plan before retrying.
- Some channels could not be added: If the composer says Draft saved, use Open draft and review the warning before creating another post.
- The saved video will not play: Use Refresh preview when offered to renew the preview link.
- The preview says Not connected: Connect the account before publishing. The preview itself does not connect or publish to an account.